Opening your tap in the morning to get a cold shower is something no one likes, especially during winters. If you happen to find yourself waiting for the hot water and it is taking forever, it may be a not-so-gentle reminder for water heater thermocouple cleaning.
If the thermocouple in the water heater is dirty, corroded, or compromised, the heating efficiency is greatly affected. Cleaning a thermocouple must be a part of the maintenance routine.
For those who don’t know what it is and how to clean a thermocouple on a water heater, we have got you covered up. Here is a step-by-step guide on how to clean a dirty thermocouple effectively.
Water Heater Thermocouple Cleaning Guide:
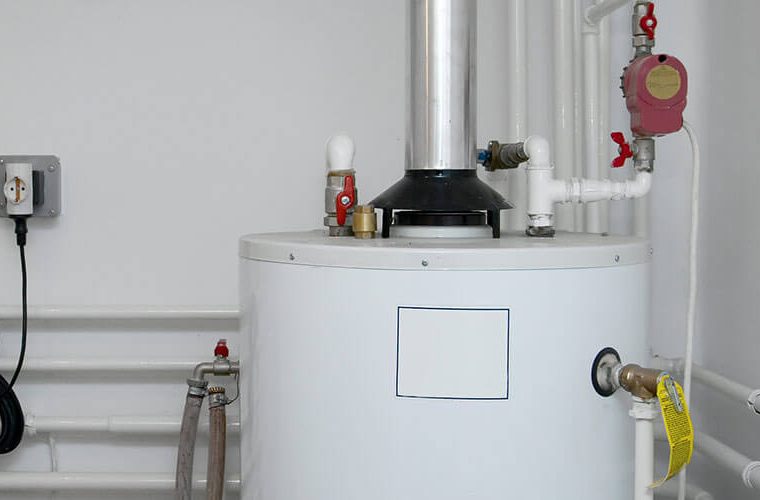
A thermocouple is a safety device attached to the gas furnace. It is directly connected to the gas valve and detects whether the pilot light is on or off. When the pilot light goes off, it disconnects the fuel supply. It senses temperature changes.
Leaving the technical jargon aside, a thermocouple when dirty or compromised, can prevent power from reaching the pilot. Replacing a worn-out thermocouple is always an option but it’s best to begin by cleaning it. The removal of buildup may get it back into its working condition.
Step 1: Gather The Supplies
Cleaning the thermocouple is an easy DIY project. The simple tools and supplies in your toolkit are enough. You will need some screwdrivers, emery sandpapers, lint-free clothes, and a camera. If you haven’t got any of these already, they are easily available in home improvement stores.
Step 2: Turn Off The Power
The first step is to turn off the power. Cut the fuel supply to water by turning off the gas valve. Whether you are going to clean or replace the thermocouple, this should always be the first step for your safety. Several cases of house fires and injuries related to water heaters are reported every year. Make sure you are following the safety measures.
Step 3: Remove The Burner Assembly
Once you are sure the fuel supply is interrupted, let it cool for a while. While it is cooling down, take a picture of the burner assembly so that you can fix it back easily. Use a good quality wrench to disconnect the burner assembly from the control center. It is generally connected at three places, pilot supply tube, main supply tube, and thermocouple.
You can always consult the user’s manual of your water heater to find out the specific instructions for your water heater model. As it is entirely disconnected, slide it out of its compartment.
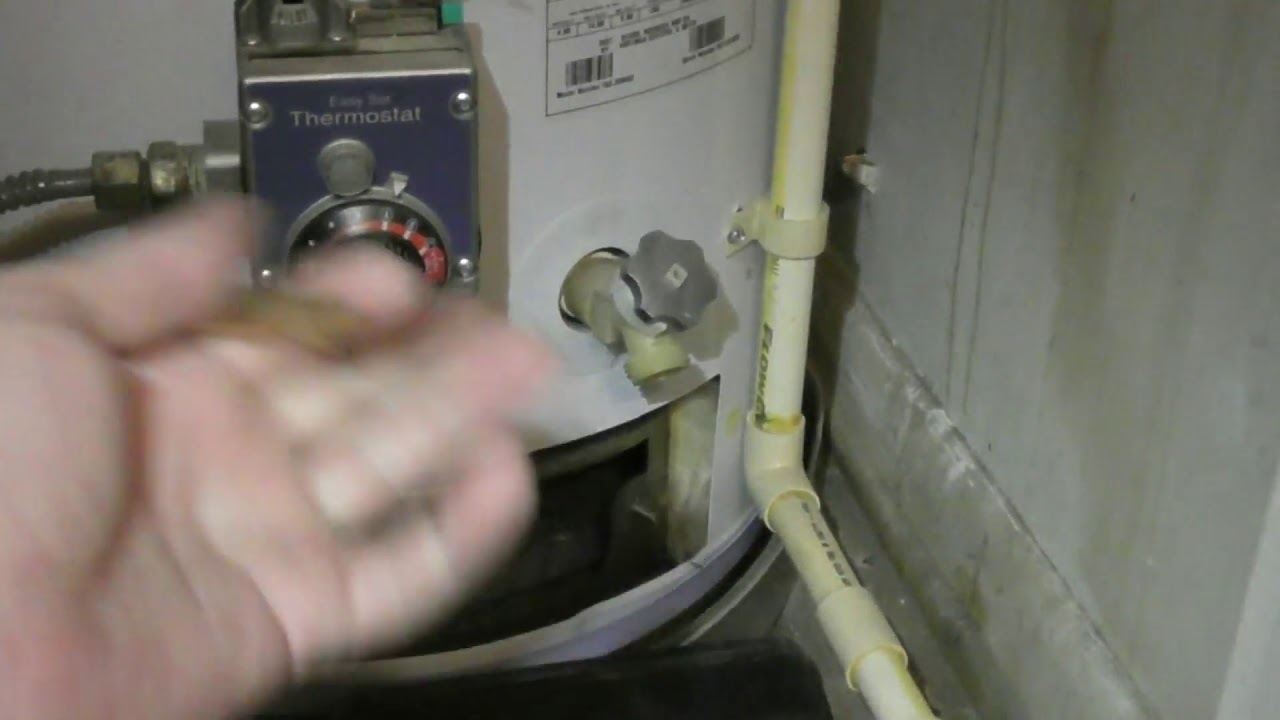
Step 4: Identify The Thermocouple
A thermocouple is a thin metal tubing or a wire that is located next to the pilot light. For most water heater types, you would need a wrench or screwdrivers to loosen it. Take it out and inspect it carefully for corrosion and buildup. If it is corroded, the best course of action is to replace it. But if all you see is buildup or greasy gunk, proceed to the next step of cleaning.
Step 5: Clean The Corrosion And Build-Up
Hold the thermocouple in your hand carefully. Use the emery sandpaper to sand it. You can also use steel wool or an abrasive sponge if you don’t have access to the sandpaper. Apply gentle and even pressure to remove the buildup. Be sure to scrub the threading of the screws that connect the thermocouple to the unit. If you are using any kind of cleaning product your ease, make sure it is not a flammable one.
Step 6: Wipe It Clean
Once you are sure the build-up is removed, use a lint-free soft cloth to wipe it. If you see any buildup remaining on the thermocouple, repeat steps 5 and 6 until it comes out shiny and clean.
Step 7: Clean The Burner (Optional)
More often than not, a clogged burner worsens the issue and may even affect the function of the thermocouple. Scrape any debris off the burner. You can also use thin needles to remove any encumbrances.
Step 8: Fix The Thermocouple And Burner Assembly
Now is the time to fix things back into their place. Take out the picture you took to recall what it looked like. Reconnect the three lines of the burner assembly. Make sure the connections are secured carefully.
Step 9: Light The Pilot
After attaching it to the unit, it’s time to check what you did. Turn on the fuel source and light the pilot. Turn the dial to your desired temperature. If the pilot is properly lit, you are good to go.
How To Replace The Thermocouple?
There comes a time when cleaning the thermocouple is not enough. Take a picture of your current thermocouple and purchase a new one similar to this. Skip steps 5 and 6 and you can use this guide for replacing the thermocouple.
Frequently Asked Questions:
Q: Where is the thermocouple on a water heater?
A thermocouple is a simple device that is used in appliances such as water heaters. Its primary function is to convert the burning flame from the pilot burner into a small electrical current. This allows it to work as a switch or a buffer, controlling the flow of gas or current from the supply to the main components. You will find a thermocouple as part of the pilot burner assembly apparatus which is connected to the outside of the heater’s body.
Q: How to change the thermocouple on the water heater?
In order to change the thermocouple on the water heater, you need an adjustable wrench and wrench set. Along with the two gas lines, remove the thermocouple. After that, you need to undo the burner assembly and detach the thermocouple from the apparatus. Keep in mind that one of the reasons why pilot lights don’t stay long is because of malfunctioning thermocouples. When you are done detaching the thermocouple from the burner assembly, vacuum the burner assembly and all the components before replacing the older thermocouple with a newer one.
Q: How does a thermocouple work in a water heater?
In a water heater, a thermocouple plays a primary role in its functioning. Essentially, it works as a buffer or a switch that controls the amount of current that can pass through the apparatus. It is attached to the burner assembly and connects to the gas control valve. It converts heat from burning flame into a small electric current. In most malfunctioning cases of water heaters, the thermocouple is the culprit. So, it is best to replace the thermocouple before installing a new unit altogether.
Q: How to clean a thermocouple on a gas furnace?
Before cleaning the thermocouple, you need to unscrew it from the burner assembly. For perfect cleaning and restoration, the best material is steel wool or the sturdy side of a sponge. This can help you in removing impurities, such as soot, from the thermocouple without damaging the thermocouple. There is a misconception about using cleaning and bleaching products, especially steering clear of materials that are inflammable. When you are done cleaning the apparatus, reattach the thermocouple and check the flame so that everything is fine.
Q: Testing Hot Water Heater Thermostat
For testing the hot water heater thermostat to check its integrity, you need to remove it from the water heater. Once it is removed, you need a multimeter with the capacity to read millivolts and a source of the fire. Attach the clips to your multimeter and one side with the length of the thermocouple. Then, make contact between the source of fire and the thermocouple. If a thermocouple is fine, you will notice the fluctuation in millivolts in a multimeter. If not, you know it is time to dig deeper.
Q: How to quiet a direct power vent water heater?
Noise pollution can become a real issue when it disturbs at night and wakes you and your neighbors up. People often have problems with direct power vent water heaters as they make a loud noise. There are many ways to go by which noise can be minimized.
- Reduce the amount of vibration from the water heater
- Extend the exhaust pipe towards the ground to muffle the sound
- Extend the exhaust pipe up towards the roof to reduce the noise
- Create a sound barrier
- Buy a muffler
If you are dealing with noise complaints and the neighbors are about to plug your vent with an old t-shirt, then you should give some of these methods a try.