Your home is defined by the essential systems it has installed in it that support your lifestyle. We are so dependent on their proper functioning that it is hard to think about laundry day without a washing machine and a dryer. In most of the houses, the essential systems or support systems are varied and serve different purposes. They include water, gas, and power utilities and appliances.
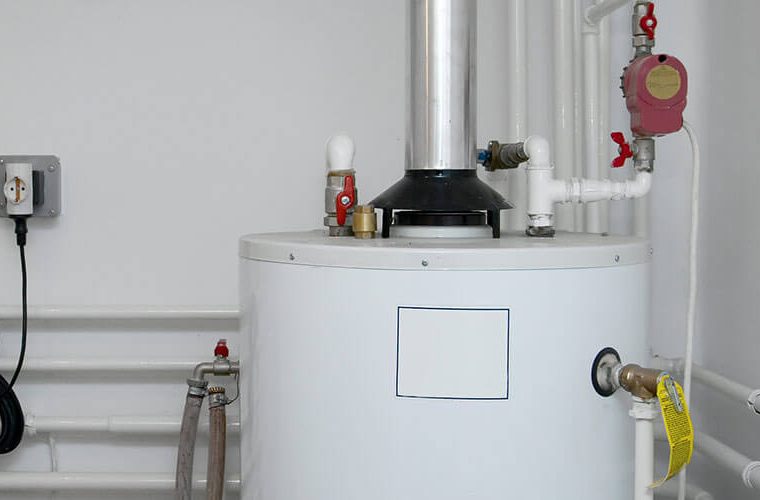
One of the most useful appliances in this regard is a water heater. It is no short of a wonder machine that makes freezing water into a steaming lot and is used for a variety of purposes, such as cleaning, bathing, etc. People living in extremely cold conditions appreciate the supply of hot water any time of the day. This is the reason they invest much thought in buying the best hardware in the market to future-proof their expenses. Still, the real problem starts when your expensive or top of the line equipment starts to malfunction!
Should You Call A Professional?
As someone living in an urban neighborhood, it has become almost an instinct to call professional companies for a broken appliance or system in our homes and offices. It is not possible to say that there is something wrong with calling companies that are adept in taking care of the hardware. In many cases, it is best to call a repair or replacement company as soon as possible to avoid further damage.
It is because:
- They are established in the community and entrusted by a lot of people to deal with their appliances on daily basis.
- They have qualified technicians and workers who are trained and experienced in the work.
- They have all the necessary tools and equipment to make sure work is done in minimal time and did not break other things along the way.
- There are many companies and you can get great value for your money by calling multiple companies and getting quotes from each.
- Most of the time, there are guarantees attached to the repairing or replacement work which can save you from spending in the future on the same thing.
So, calling an established company for the job could have its advantages.
How To Test Water Heater Thermostat?
All good things related to a professional service aside, you need to assess whether the problem requires a team of technicians that would require you clear your schedule and would cost you a considerable amount of money. In case of a water heater’s broken thermostat, you can do it yourself if you are inclined to do it. It is good to have some technical experience to repair a malfunctioning appliance, but it is fine if you don’t.
In this post, we will go through a detailed guide on how to test and replace the water heater thermostat without calling a licensed plumber. It may sound like a daunting task, but you will be fine as long as you follow the instructions attentively.
Major Problems Of Water Heater
In the case of a broken water heater, two are the most common issues:
- Heating Elements
- Thermostat
If you are not getting any hot water from your water heater, it is time to get to work with big guns and full force.
Working Of Electric Water Heater’s Thermostat
In most cases when your electric water heater refuses to do what it should, i-e., heat up the water, its thermostat could be the culprit. Not to say that thermostats are the real problem, they could part to a problem. Keep in mind that by replacing a part in your heater, you can save yourself from expensive water heater replacement. It takes a couple of minutes and you will start getting hot water once again.
In order to understand the working of the water heater, you need to know a little about how the thermostat and heating elements work. The thermostat works as a bridge by opening and closing itself. This is how electricity could pass through it and heat up the elements. In turn, the heating elements are designed and programmed to turn on and off, depending on the demand for hot water.
In all the latest electric water heaters designed for the home, there are two thermostats and two heating elements. They can be found in the panels installed on the sides of your heater, each with one of the heating elements and thermostat.
There is a clear distinction between these two thermostats in terms of size and capability. Traditionally, the upper thermostat controls the amount of current passed through it and through the smaller one. That is why when the upper thermostat breaks down, the whole hot water supply is cut. In case only a smaller thermostat is malfunctioning, you will notice a significant reduction in the hotness of water.
It is a rare occurrence that both of the thermostats start malfunctioning at the same time. But it is best that you replace both at the same time to avoid inconvenience in the near future.
ALSO READ: How To Clean Thermocouple On Water Heater
Electric Water Heater Thermostats Are Not Universal
There is a misconception about water heater thermostats being universal. It is not true and you need to make sure you have the relevant information about the voltage and type of thermostat. You can easily find this information on the side of the heater on a tag. If the tag is removed, it is safe to assume that the voltage required for the thermostat is 240 volts.
Another dilemma that many of the owners have to face is the whopping number of brands in the market when it comes to manufacturers of thermostats. Make sure you go through product specifications before setting your heart on one.
Necessary Tools & Equipment
In the beginning, we established the premise that you can test the water heater thermostat at home without calling a licensed plumber. But there are still some necessary tools and equipment that you need in order to remove and install malfunctioning parts.
So, as part of the DIY guide, you need to procure these tools and equipment:
- 1/4-inch nut driver or Flathead Screwdriver
- #2 Phillips screwdriver
- Analog or Digital Multimeter/Voltmeter
- A replacement thermostat
9 Steps To Test Water Heater Thermostat?
1. Check Continuity
The basic part of checking the thermostat of your water heater is to check for continuity. It is because this will determine whether your thermostat requires replacement or just fine. Using an analog or digital multimeter, you can check the continuity of the thermostat and take it from there. Keep in mind working around electrical appliances could be dangerous. So, take every precaution while working on the water heater thermostat test.
2. Turn Off The Power
As mentioned in the previous section, your well-being is above all else. While working around your water heater, the primary step would be to ensure that all power lines leading to the appliance are turned off. To do this, you should head to the main panel box and find the breaker under the heading “water heater” or “hot water”. If there is no labeling to begin with, you can find the breaker by flipping each breaker and then keeping the relevant breaker off. Make sure to label it for future reference.
3. Remove Access Covers
While using a ¼-inch nut driver or flathead screwdriver, you can remove upper and lower thermostat access panels and fold the insulation over the thermostats. To tuck away insulation, use tape and keep the way clear. Then, undo the plastic covers from the thermostat so that you have a clear line of sight for easy work.
4. Confirm Power Is Off To Water Heater
In order to work close to the water heater, you should make sure that everything is turned off from the power supply. Use a multimeter or a voltage stick to ensure the water heater has no electrical supply.
If you are using a multimeter, you can check the current by connecting the top to the legs, both at the same time. The meter should indicate zero because this will confirm that the current is cut off. In addition to that, touch each leg while the black connector is touching the water heater.
5. High Limit Reset Button
Determine whether the high limit reset button has tripped or not. Here are the instances that trigger the button to trip:
- The thermostat is out of calibration
- The heating element is failed
- Thermostat contacts have closed fuse.
Make sure you have tripped the high limit reset before tinkering with the thermostat of your electric water heater.
6. Disconnect The Wiring
With the #2 Phillips screwdriver, you should disconnect the terminals from each thermostat. As a pro tip, make sure you snap a picture from your smartphone about which wires are connected to which terminals. This comes in super handy as a future reference so that you do not have to worry about connecting the wrong wires with the consecutive terminals.
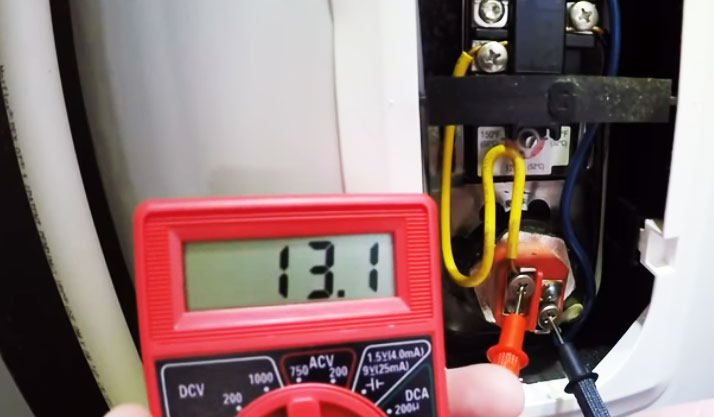
7. Check Thermostat With A Multimeter
If you are using an analog multimeter, you need to set the multimeter to one of the lowest ohms. After this, you can calibrate the meter by pinching the needles together and set the reading at 0.
For those who are dealing with a digital multimeter, you can set the resistance around 200, which is one of the lowest ohms of resistance in digital machines. There are some models that use tone with resistance to indicate if there is any. If your apparatus has that option, it is best to use it for authentic readings.
8. Checking The Terminals
The step of testing each thermostat could be divided into two parts, each consisting of testing one thermostat at a time.
When you are dealing with the bigger thermostat, take one of the black probe needles from the meter and set it on the left side of the terminal and then take the red needle and set it on the other left side terminal on the thermostat. If it shows continuity, the readings should be close to zero. If there is no continuity, it means that the main thermostat has failed and needs immediate replacement. For the right-side terminals, you need to repeat the process and take notes of the results.
In case your upper thermostat is fine, you should repeat the process with the smaller thermostat and take note of the results.
9. Reconnect The Wiring
This is all to the testing of thermostats and checks if they need replacement or not. After completing the tests, you should reconnect the wiring to cover the access panels with their lids to ensure they are not accessible to other people and the wires are not bare.
After this, there are two courses that you can choose, based on the circumstances.
- You should advance to the next step which is replacing the thermostats. This should not be a problem for you if you can follow a step-by-step guide like this one on how to replace the thermostats on your electric water heater.
- If both thermostats are fine, you can go on and check the integrity of the heating elements. This is another set of parts that are often reported to break down in the event a water heater is not working properly.
Conclusion
The electric water heater is one of the most complicated pieces of appliances in your house if you need to dissect it inside out. Luckily, in the case of replacing the thermostats or checking the integrity of heating elements, you do not need to be a full-time plumber to deal with the issue.
The thermostat is one of the main components of a water heater that works as a bridge and partially allows electric current to pass through it. In turn, this electric current heat up elements in the heater to heat up the water in the water tank. As stated earlier, it is in your interest to replace both thermostats at the same time, even when one is working just fine.